C4D贴图绘制好的系统学习视频教程第八卷cmiVFX – Cinema 4D Ultimate Learning System 2.0 Volume 8 BodyPaint

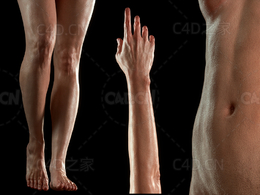
好的系统学习视频教程第八卷 BodyPaint,我们将介绍BodyPaint,一个神奇的工具,它允许我们使用paint工具在2d和3d环境中绘图。首先,我们来看看BP特有的布局。然后我们将回顾UV多边形之间的差异和几何多边形相关的方法。我们将学习必要的BodyPaint工作流,包括我个人zui*喜欢的,使用向导。在教程的zui*后,你可以学会如何新建材质和UV坐标,包括根据你的喜好优化一个项目,模型,男人的手臂,皮肤纹理,然后添加一些纹身。
In Volume 8 of the Ultimate Learning System, we’ll cover BodyPaint, an amazing tool that allows us to paint in a 2D and 3D environment at the same time. First, we’ll look at the different managers that are unique to the BP layout. Then we’ll review the difference between UV polygons and geometry polygons as well as the ways that they relate. We’ll learn the workflow necessary to get the most from BodyPaint, including my personal favorite, using the wizard. By the end of this volume, you’ll be able to set up material and UV coordinates and optimize your preferences for BP, and we’ll work on a project together to prepare a model of a man’s arm, create a skin texture, and then add some tattoos.

In Volume 8 of the Ultimate Learning System, we’ll cover BodyPaint, an amazing tool that allows us to paint in a 2D and 3D environment at the same time. First, we’ll look at the different managers that are unique to the BP layout. Then we’ll review the difference between UV polygons and geometry polygons as well as the ways that they relate. We’ll learn the workflow necessary to get the most from BodyPaint, including my personal favorite, using the wizard. By the end of this volume, you’ll be able to set up material and UV coordinates and optimize your preferences for BP, and we’ll work on a project together to prepare a model of a man’s arm, create a skin texture, and then add some tattoos.
Chapter 1: Layout and Basic Concepts
Chapter 2 is a comprehensive overview of the amazing tools offered in BodyPaint, including my personal favorite, the wizard. Using the wizard is an amazing timesaver once you have your workflow worked out and lets you condense multiple steps into a couple of clicks. Next, we use the material manager to show the different maps that can be painted on a material and the layer manager to show the different layers and alpha masks. Over the chapter, we also review the brush settings, clone stamp, gradient tool, fill, photo retouching tools, text tool, custom shapes, and the line tool.
This Chapter kicks off the tattooed arm project. First, we set up our materials and UVs using the wizard, then we break our model up into various UV islands. Next, we’ll use the UV peeler and relax to refine our UV coordinates to create our final UV layout for our texture page.
This Chapter is an overview of the different mapping types. We’ll learn how to use the interactive mapping tool to apply mapping coordinates to polygon selections instead of the whole model. We’ll also go into more detail on using the UV peeler and relax tools which were introduced in Chapter 3, as well as the magnet tool for making minor, point-level changes.
Chapter 5: Projection Painting Part 1
Chapter 6: Projection Painting Part 2
In this Chapter, I’ll review using the clone brush to clean up any artifacts in our skin texture. Then, we use hide polygons to reach occluded areas.
In my favorite Chapter of this volume, we’ll add a bunch of tattoos to our arm. We’ll make extensive use of the layer manager to organize our layers and layer sets. We’ll also work with the content browser and picture viewer to easily access assets.
Chapter 9: Custom Brushes
About The Instructor
After studying film and sculpture at the San Francisco Art Institute, Greg Kulz began working full-time as an artist in the SF Bay Area. Always interested in experimenting with new techniques and methods, Greg turned to 3D motion graphics as his new medium in 2001. Since that time, he has worked on such projects as the Team America and WWE video games, Ironman, various short films and a number of product modeling contracts for corporate clients including Sony, Panasonic and Frito-Lay. Greg's first love remains character creation, but he also enjoys working with motion graphics, texturing, and modeling.
|
|
 50多种GSG高品质科技产品贴图素材预设合集GSG Material:Tech Product
 C4D OC人物皮肤材质球腿部手臂身体头部脸部皮肤纹理Skin Material For Octane Render & Cinema 4D
 C4D利用随机颜色节点制作多彩糖果圆环视频教程Skillshare – Realistic Ring Pops ...
 C4D毛发3S材质OCTANE工程
 C4D+OC 10分钟学会展UV毛发3S材质渲染教程(含工程文件)
 C4D搭配RizomUV,SP软件展UV教程Cinema 4D to Rizom UV to Substance Painter Workflow
 C4D利用Redshift制作渲染蜗牛河边喝水的场景 C4D Redshift BodyPaint Environment
 C4D使用制作卡通母鸡小场景教程 Redshift C4D Bodypaint Chiсken
 C4D Redshift渲染器快速掌握指南写实蜗牛案例教程 C4D Redshift Snail BodyPaint
 C4D模型展UV贴图基础教程 Pluralsight – CINEMA 4D UV Mapping Fundamentals
 C4D异形抱脸虫建模动画完整实例制作视频教程
 C4D BP基础教程 Introduction to BodyPaint in Cinema 4D
 招聘【3D设计师(材质师方向)】
 Cinema 4D 全面学习系统教程 2.0 Vol.1-8 Cinema 4D Ultimate Learning System 2.0
 C4D中文教程:如何把多张贴图分别指定给多个对象(不在人间)
 C4D运行BodyPaint 3D制作一个锈迹斑斑的油桶教程(老教程)
 C4D快速展UV中文实例教程(十点半/豆腐出品)
 数字人C4D贴图雕刻UV之八:再谈C4D的UV


Comment :7