Cinema 4D 和 After Effects 创建弹出式风格广告片Pluralsight - Building a Pop-up Style Broadcast Opener in CINEMA 4D and After Effects

In this course we’ll learn to use CINEMA 4D and After Effects to build a motion graphics opener in a pop-up style. The theme for our project will be movies, so we’ll start out by building a film reel to serve as a base for our animated vignettes. Once our base is complete, we’ll go through the process of building up some iconic movie scenes using many of CINEMA 4D’s great modeling tools. As we construct our models, we’ll think about how we will eventually animate them to make our lives easier down the road. We’ll also add materials as we go. Once we have the models built, Laura will come into the pipeline and teach you how to set up the main camera and target using splines. However that’s not the end of the camera work. The large camera move at the end is achieved with a Morph Camera set up which will also be covered. Once the camera move is done, we’ll add animation to our vignettes. We’ll learn to create pop-up animation effects as we have the different pieces appear on the screen in a variety of ways. Once the vignettes have appeared, we’ll add other animation touches to keep them alive and moving. In the final portion of the course, Laura will take you through the lighting, rendering and compositing of the project. The rendering portion is integral to the capabilities we have in post. She will show all the different passes, buffers, tips, and tricks for getting the fastest render time and the most control once we import to After Effects. Once we’re ready to composite in After Effects, we will introduce 3 plugins that make depth of field, motion blur, and lens flares more realistic and easier to control than any of the built in effects. You’ll also learn how to extract data from the CINEMA 4D file to make your composite better than ever with CINEWARE. After the main portion of the compositing is done, we’ll switch gears to create a traditional animation style logo as the close of the shot. You’ll learn how to easily fake that hand-drawn look in a fraction of the time it would take to draw it by hand. We finish out by adding some Camera Lens Effects to finalize the overall look and feel. By the end of this course, you’ll have seen what it takes to go from nothing to a complex and completely finished miniature pop-up style motion graphics opener.
1 Introduction and Project Overview Watch it now 02:23
Creating the Film Reel 2 Creating the Film Reel Free with Demo » 07:34
Attaching the Film Reel 3 Attaching the Film Reel Free with Demo » 07:54
Finishing the Film Reel 4 Finishing the Film Reel Free with Demo » 10:10
Creating the Lighting Environment 5 Creating the Lighting Environment Free with Demo » 08:46
Creating the Street with Booleans 6 Creating the Street with Booleans Free with Demo » 10:08
Building the Ghost 7 Building the Ghost Free with Demo » 08:41
Finishing the Ghost 8 Finishing the Ghost Free with Demo » 06:04
Adding Materials to the Ghost 9 Adding Materials to the Ghost 05:51
Modeling the Beach 10 Modeling the Beach 08:30
Modeling a Buoy 11 Modeling a Buoy 09:40
Building a Shark Fin 12 Building a Shark Fin 11:08
Modeling the Billboard 13 Modeling the Billboard 06:50
Finishing the Billboard 14 Finishing the Billboard 03:22
Modeling the Mountain 15 Modeling the Mountain 12:02
Adding Materials to the Mountain 16 Adding Materials to the Mountain 04:36
Adding Trees with Cloners 17 Adding Trees with Cloners 08:33
Randomizing Tree Colors 18 Randomizing Tree Colors 04:39
Building the Spaceship 19 Building the Spaceship 07:56
Finishing the Spaceship 20 Finishing the Spaceship 11:47
Adding a Crowd of People 21 Adding a Crowd of People 07:40
Creating the Gate 22 Creating the Gate 09:38
Building the Sign with Splines 23 Building the Sign with Splines 07:50
Modeling the Doors 24 Modeling the Doors 06:52
Adding Materials to the Gate 25 Adding Materials to the Gate 05:59
Adding Ferns with Cloners 26 Adding Ferns with Cloners 08:05
Adding Palm Trees 27 Adding Palm Trees 07:23
Modeling the Large Cliff 28 Modeling the Large Cliff 10:35
Adding Materials to the Cliff 29 Adding Materials to the Cliff 06:01
Modeling the Mine Track 30 Modeling the Mine Track 09:14
Finishing the Mine Track 31 Finishing the Mine Track 07:07
Modeling the Scaffolding 32 Modeling the Scaffolding 08:55
Building the Mine Cart 33 Building the Mine Cart 09:26
Modeling Cart Occupants 34 Modeling Cart Occupants 06:28
Finishing the Occupants 35 Finishing the Occupants 06:47
Attaching the Mine Cart to a Path 36 Attaching the Mine Cart to a Path 07:41
Creating Arrows 37 Creating Arrows 10:16
Setting Up For Transition Foliage 38 Setting Up For Transition Foliage 05:07
Creating Transition Grass 39 Creating Transition Grass 06:58
Creating Transition Trees 40 Creating Transition Trees 04:33
Creating Transition Ferns 41 Creating Transition Ferns 04:17
Setting Up the Cameras, Targets and Tags 42 Setting Up the Cameras, Targets and Tags 10:19
Animating the Main Shot Camera and Target 43 Animating the Main Shot Camera and Target 12:39
Animating Camera Two for the Wide Shot 44 Animating Camera Two for the Wide Shot 05:10
Creating a Morph Camera and Animating the Blend 45 Creating a Morph Camera and Animating the Blend 02:50
Baking the Morph Camera 46 Baking the Morph Camera 03:30
Animating Devil's Tower 47 Animating Devil's Tower 07:44
Animating the Spaceship 48 Animating the Spaceship 07:03
Animating the Crowd 49 Animating the Crowd 08:56
Animating the Beach Appearing 50 Animating the Beach Appearing 04:01
Animating the Buoy and Water 51 Animating the Buoy and Water 07:06
Animating the Billboard Transition 52 Animating the Billboard Transition 05:07
Animating the Transition Grass 53 Animating the Transition Grass 05:25
Animating the Road 54 Animating the Road 03:34
Animating the Ghost Appearing 55 Animating the Ghost Appearing 06:23
Animating the Ghost Walk Cycle 56 Animating the Ghost Walk Cycle 05:53
Animating the Gate 57 Animating the Gate 07:09
Adding the Torches 58 Adding the Torches 09:59
Animating the Sconces 59 Animating the Sconces 06:06
Animating the Foliage 60 Animating the Foliage 06:49
Animating the Cliff 61 Animating the Cliff 07:12
Animating the Mine Carts 62 Animating the Mine Carts 03:58
Animating the Arrows 63 Animating the Arrows 08:26
Adding the Lighting and Sky to the Shot 64 Adding the Lighting and Sky to the Shot 11:32
Setting Up for Depth of Field 65 Setting Up for Depth of Field 14:33
Fixing the Target Path to Get a Better Focus Object 66 Fixing the Target Path to Get a Better Focus Object 09:19
Setting up the Render Settings and Testing 67 Setting up the Render Settings and Testing 12:39
Importing the Rendered Passes to After Effects 68 Importing the Rendered Passes to After Effects 04:44
Using RSMB Pro (Reel Smart Motion Blur) with the Motion Vector Pass 69 Using RSMB Pro (Reel Smart Motion Blur) with the Motion Vector Pass 09:42
Using the Frischluft Lenscare Plugin for Realistic Depth of Field 70 Using the Frischluft Lenscare Plugin for Realistic Depth of Field 06:00
Adding Glow Using the Object Buffers 71 Adding Glow Using the Object Buffers 13:46
Adding Placeholder Lights to the CINEMA 4D File 72 Adding Placeholder Lights to the CINEMA 4D File 04:27
Using Knoll Light Factory to Add Flares to Our Extracted Lights 73 Using Knoll Light Factory to Add Flares to Our Extracted Lights 10:03
Assigning the Proper Hierarchy to the Light in CINEMA 4D 74 Assigning the Proper Hierarchy to the Light in CINEMA 4D 09:49
Animating the Hand-drawn Logo 75 Animating the Hand-drawn Logo 13:12
Revealing the Letters with a Mask 76 Revealing the Letters with a Mask 10:04
Adding a Gradient Fill to the Shape Layer for the Film Strips 77 Adding a Gradient Fill to the Shape Layer for the Film Strips 10:38
Adding Realistic Lens Effects to the Composition 78 Adding Realistic Lens Effects to the Composition 10:51
Cleaning Up Issues 79 Cleaning Up Issues 05:28
|
|
 零基础到高手全方位C4D三维动画建模渲染中文教程视频资源
 Cinema 4D音响设备建模教程:从零基础到音频驱动特效动画制作完整案例教学Udemy - Cinema 4D Model, Texture and Animate Motion to Sound
 Cinema 4D乐高积木风格体素化节点预设含Scene Nodes Redshift渲染3D工程文件
 Coloso C4D动态图形动画创意三维动画从基础到高级电商包装教程+工程文件coloso woosung kang c4d motion training from the basics to master level
 Cinema 4D新手从零入门教程:全面掌握3D建模、动画、渲染和特效制作的核心技能Motion Science - Cinema 4D Quick Start
 使用X-particles4.0粒子+Octane 4.02渲染器在c4d中默认真实的雪
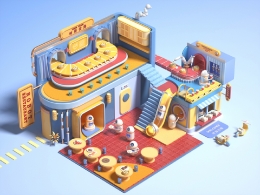
 100集c4d三维运动图形动画初学者案例视频教程[包含工程文件]C4D 100 Lecturer Exhibition for Introduction to 3D Motion Graphics
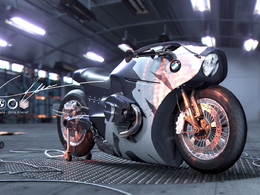
 宝马摩托车c4d建模案例视频教程BMW R NineT
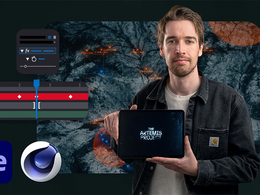
 C4D+AE科幻太空电影片头动画制作案例视频教程Domestika – Animating 3D Cinematic Sequences in AE and Cinema 4D
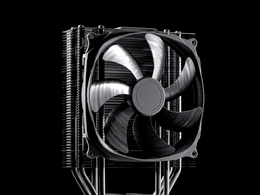
 C4d ps电脑cpu风扇渲染案例视频教程(含模型工程)
 电脑椅电竞椅动画C4D高级商业广告产品动画教程Advance Motion Design cinema C4d, Arnold, Volume I
 C4D创意图形动画教程 Domestika – Your Digital Sketchbook- Techniques to find your Personal Style with Cinema 4D & Redshift
 蓝色药瓶塑料瓶建模渲染教程3D Product Rendering in Cinema 4D & Octane
 梦幻云朵特效C4D渲染教程Dreamy Cloudy Worlds in Cinema 4D & Octane Render
 C4D初级到高级基础视频教程Udemy – Learn Cinema 4d From Scratch From Beginner To Advanced
 C4D官方使用技巧视频教程合集C4D Quick Tip
 C4D游戏手柄建模渲染教程 Gumroad – Advanced Product Modeling And Rendering Volume 2
 C4D绳子动力学动画中文视频教程
 C4D用xp粒子制作树叶人飘散动画中文视频教程
 C4D绳子动力学制作缠绕鞋子的动画中文视频教程




![100集c4d三维运动图形动画初学者案例视频教程[包含工程文件]C4D 100 Lecturer Exhibition for Introduction to 3D Motion Graphics](data/attachment/forum/threadcover/3b/0c/84859.jpg)



Comment :2